


£7.50
Classic rock distortion inspired by the legendary tones of Zakk Wylde.
Out of stock
Description
Classic rock distortion inspired by the legendary tones of Zakk Wylde.
Just classic, overdrive tones with tons of flexibility – a great build if you need boost, drive and distortion but you have limited space on your pedal board.
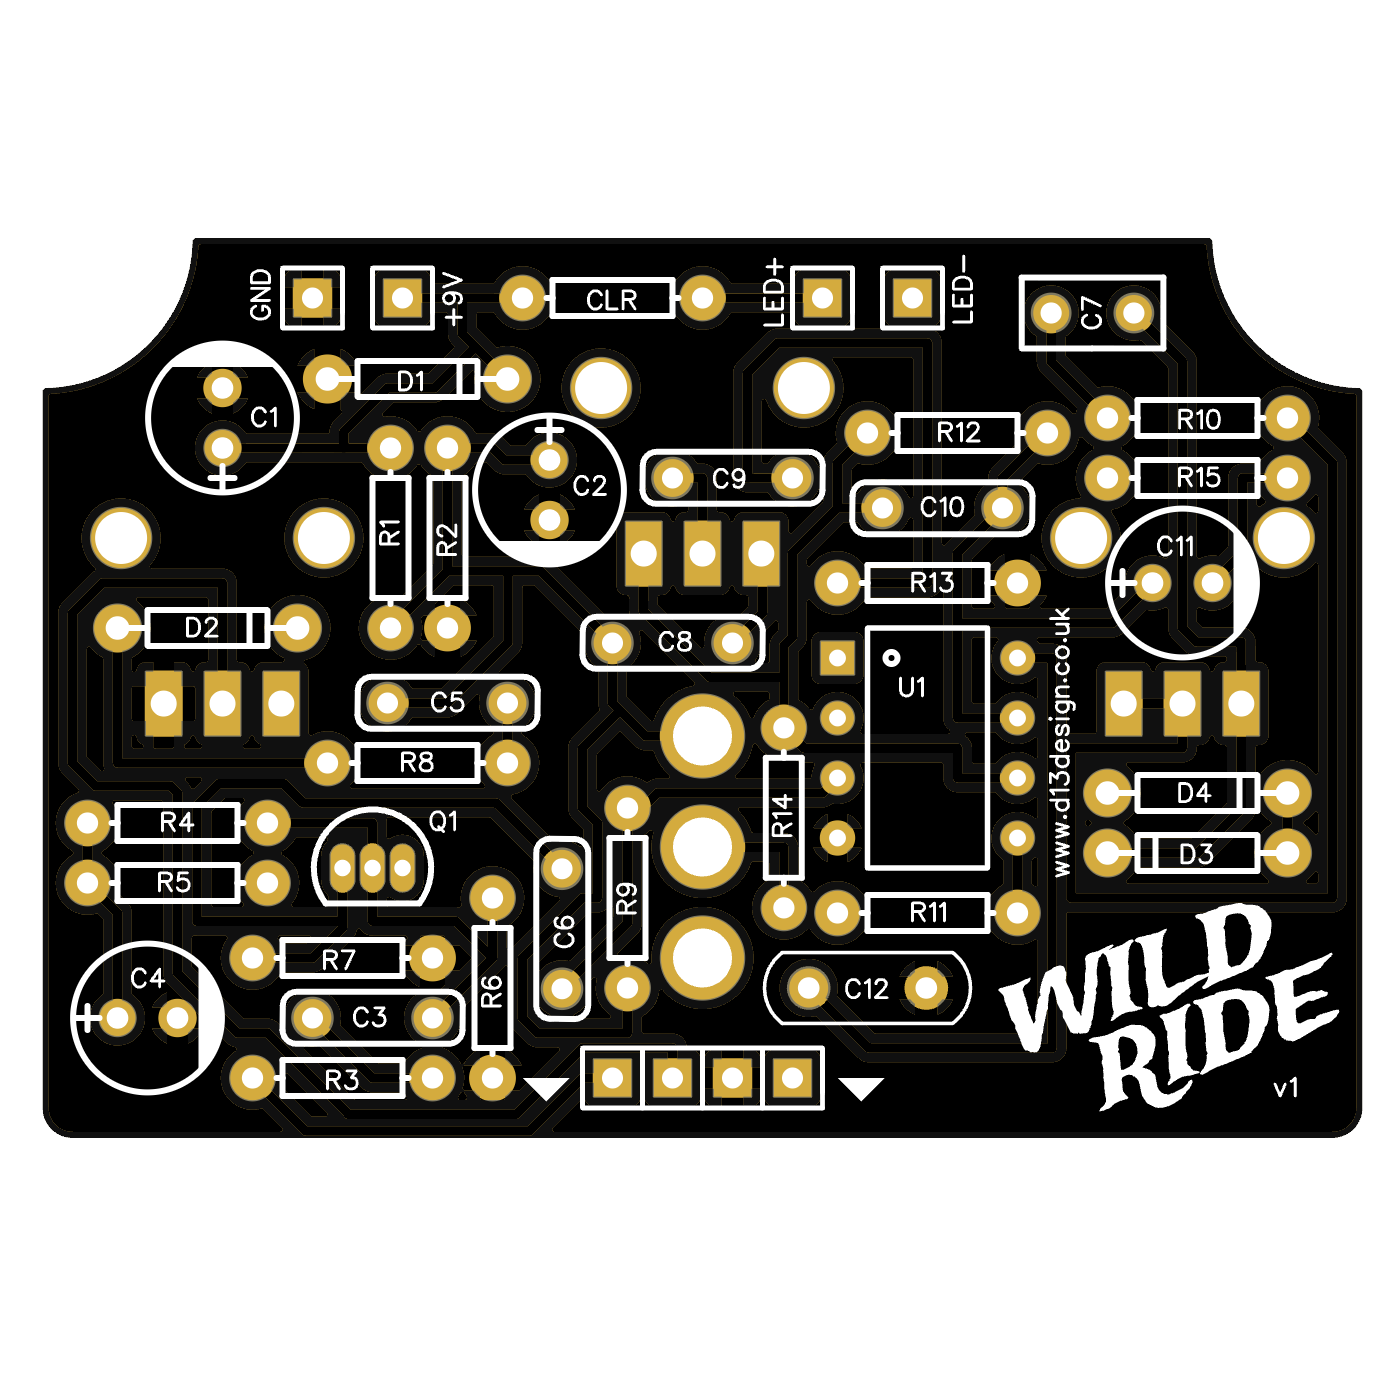
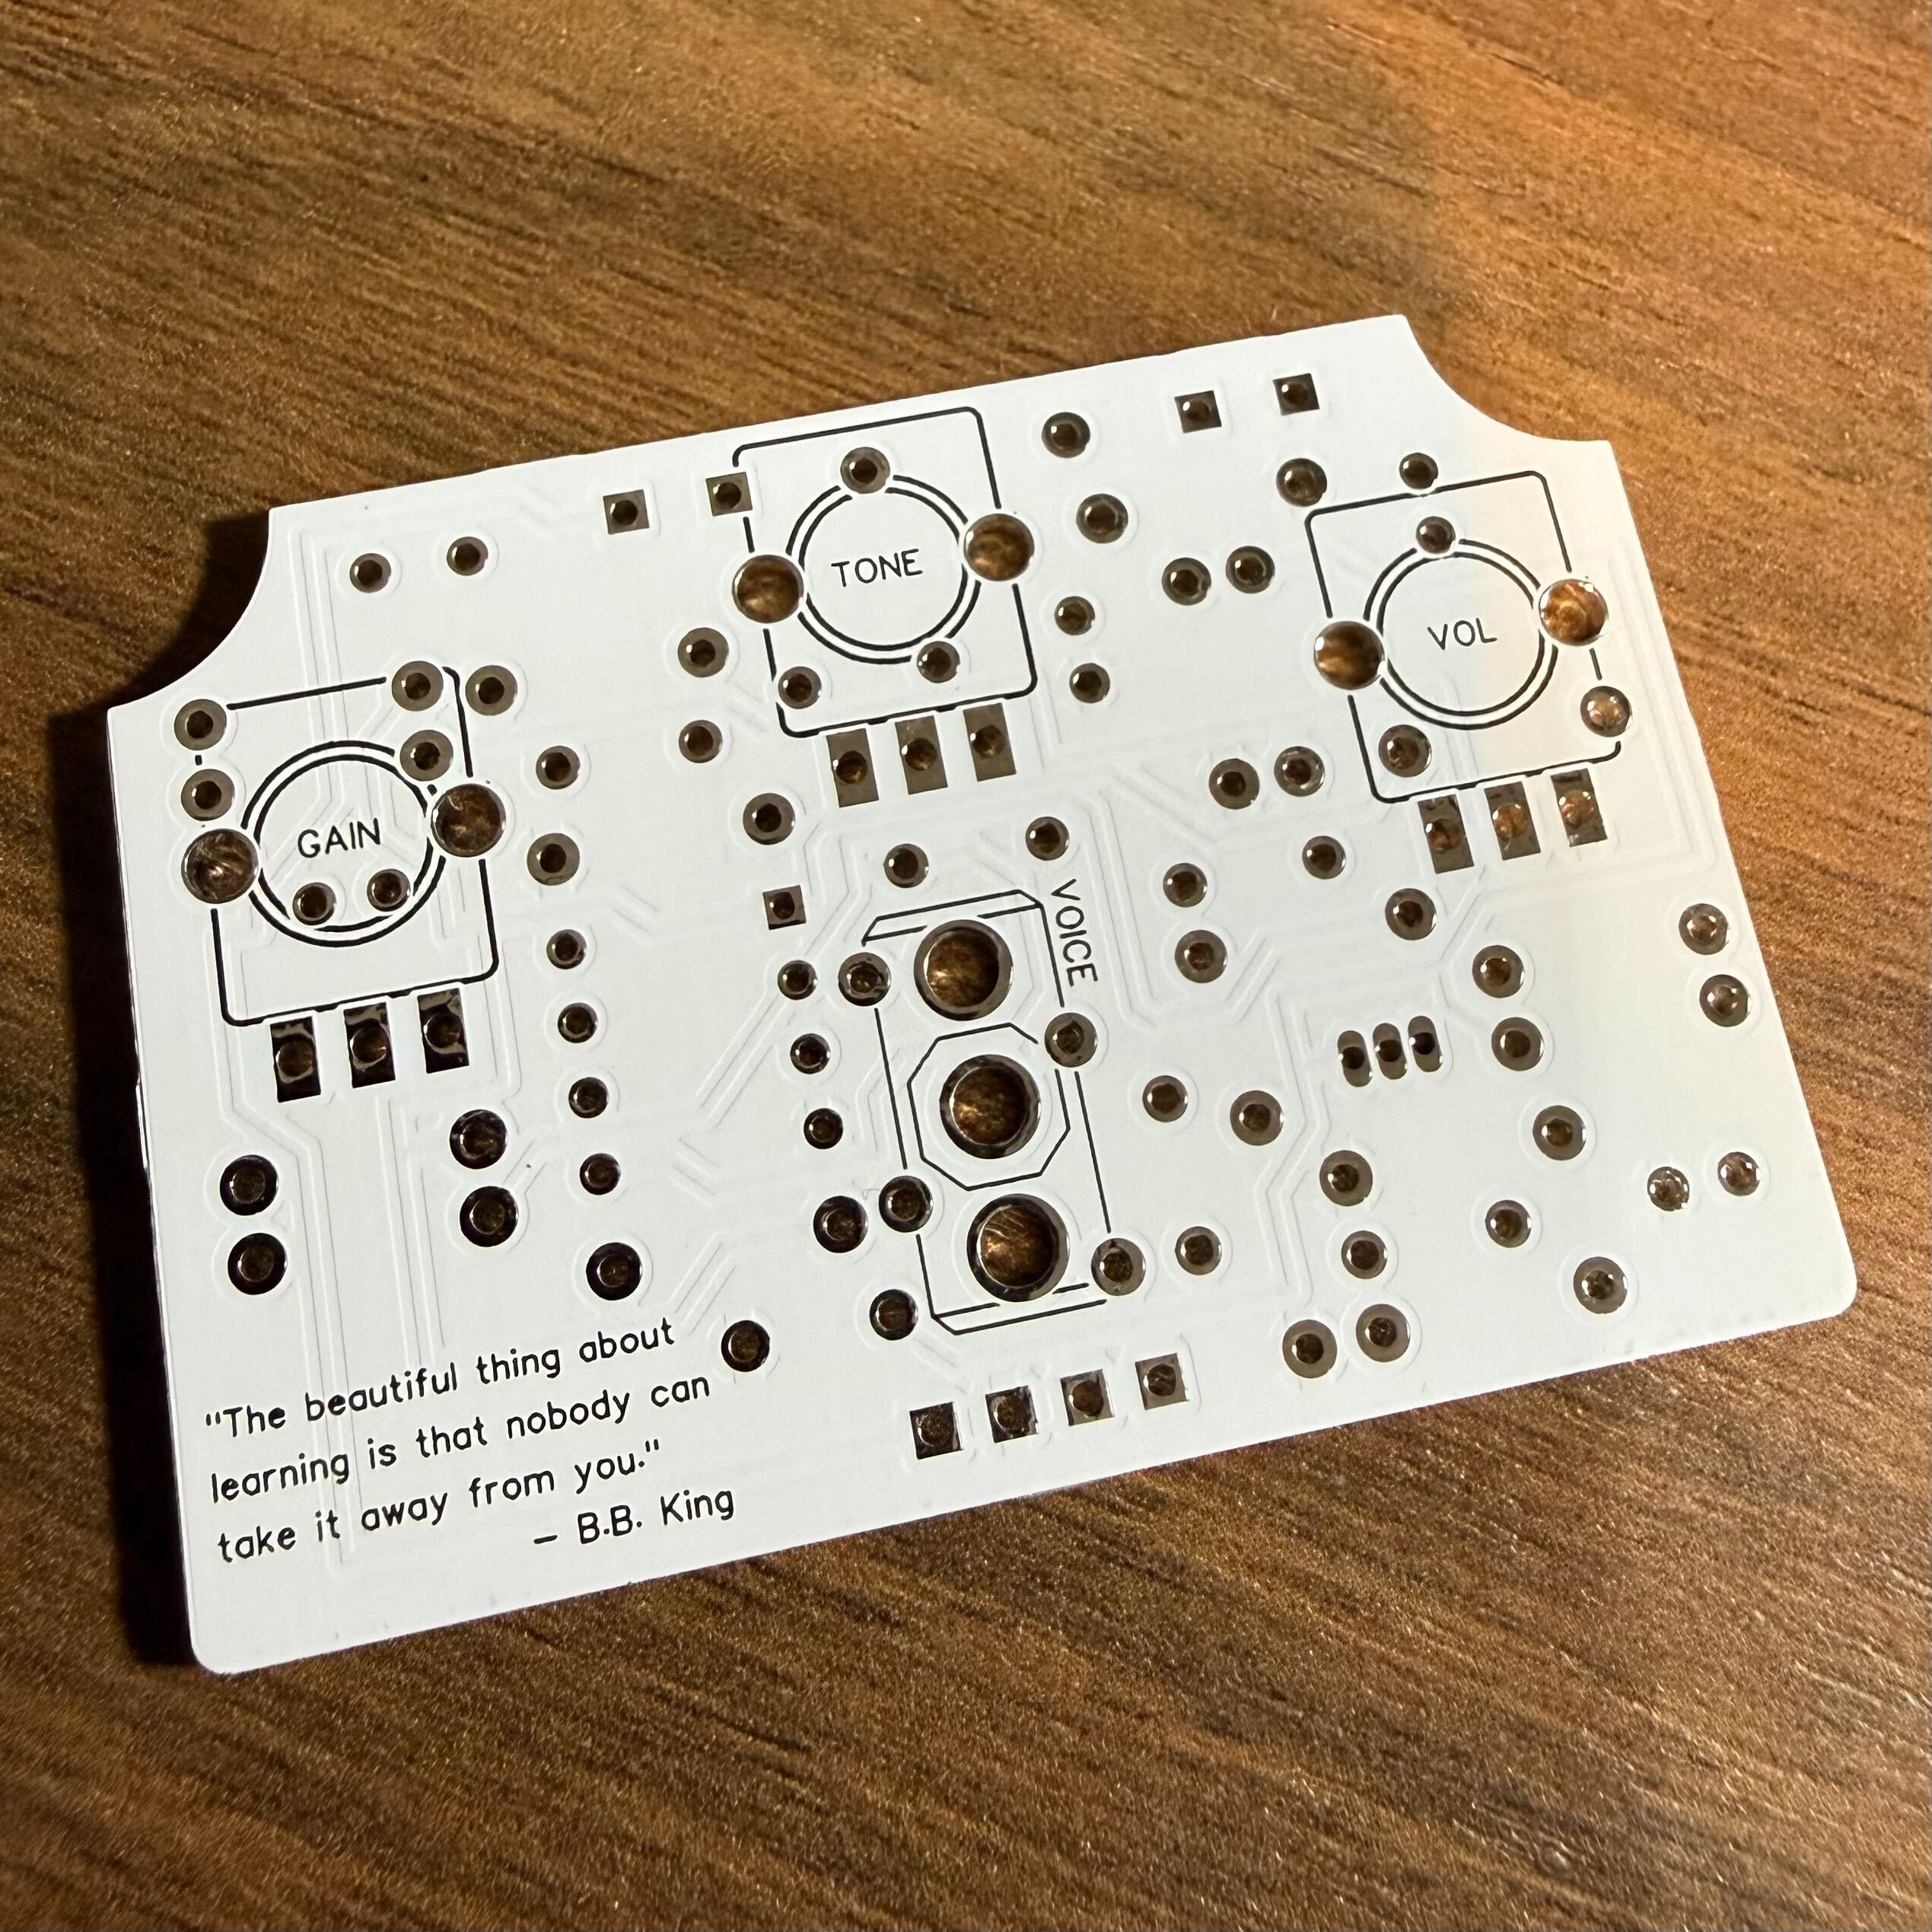
FYI: The actual PCBs are white rather than black – check out the photos for more.
Designed to fit a 1590B enclosure with 9mm pots (just remember to get ones with nuts!) and a voice switch to move between GT-OD inspired and ZW-44 voices.
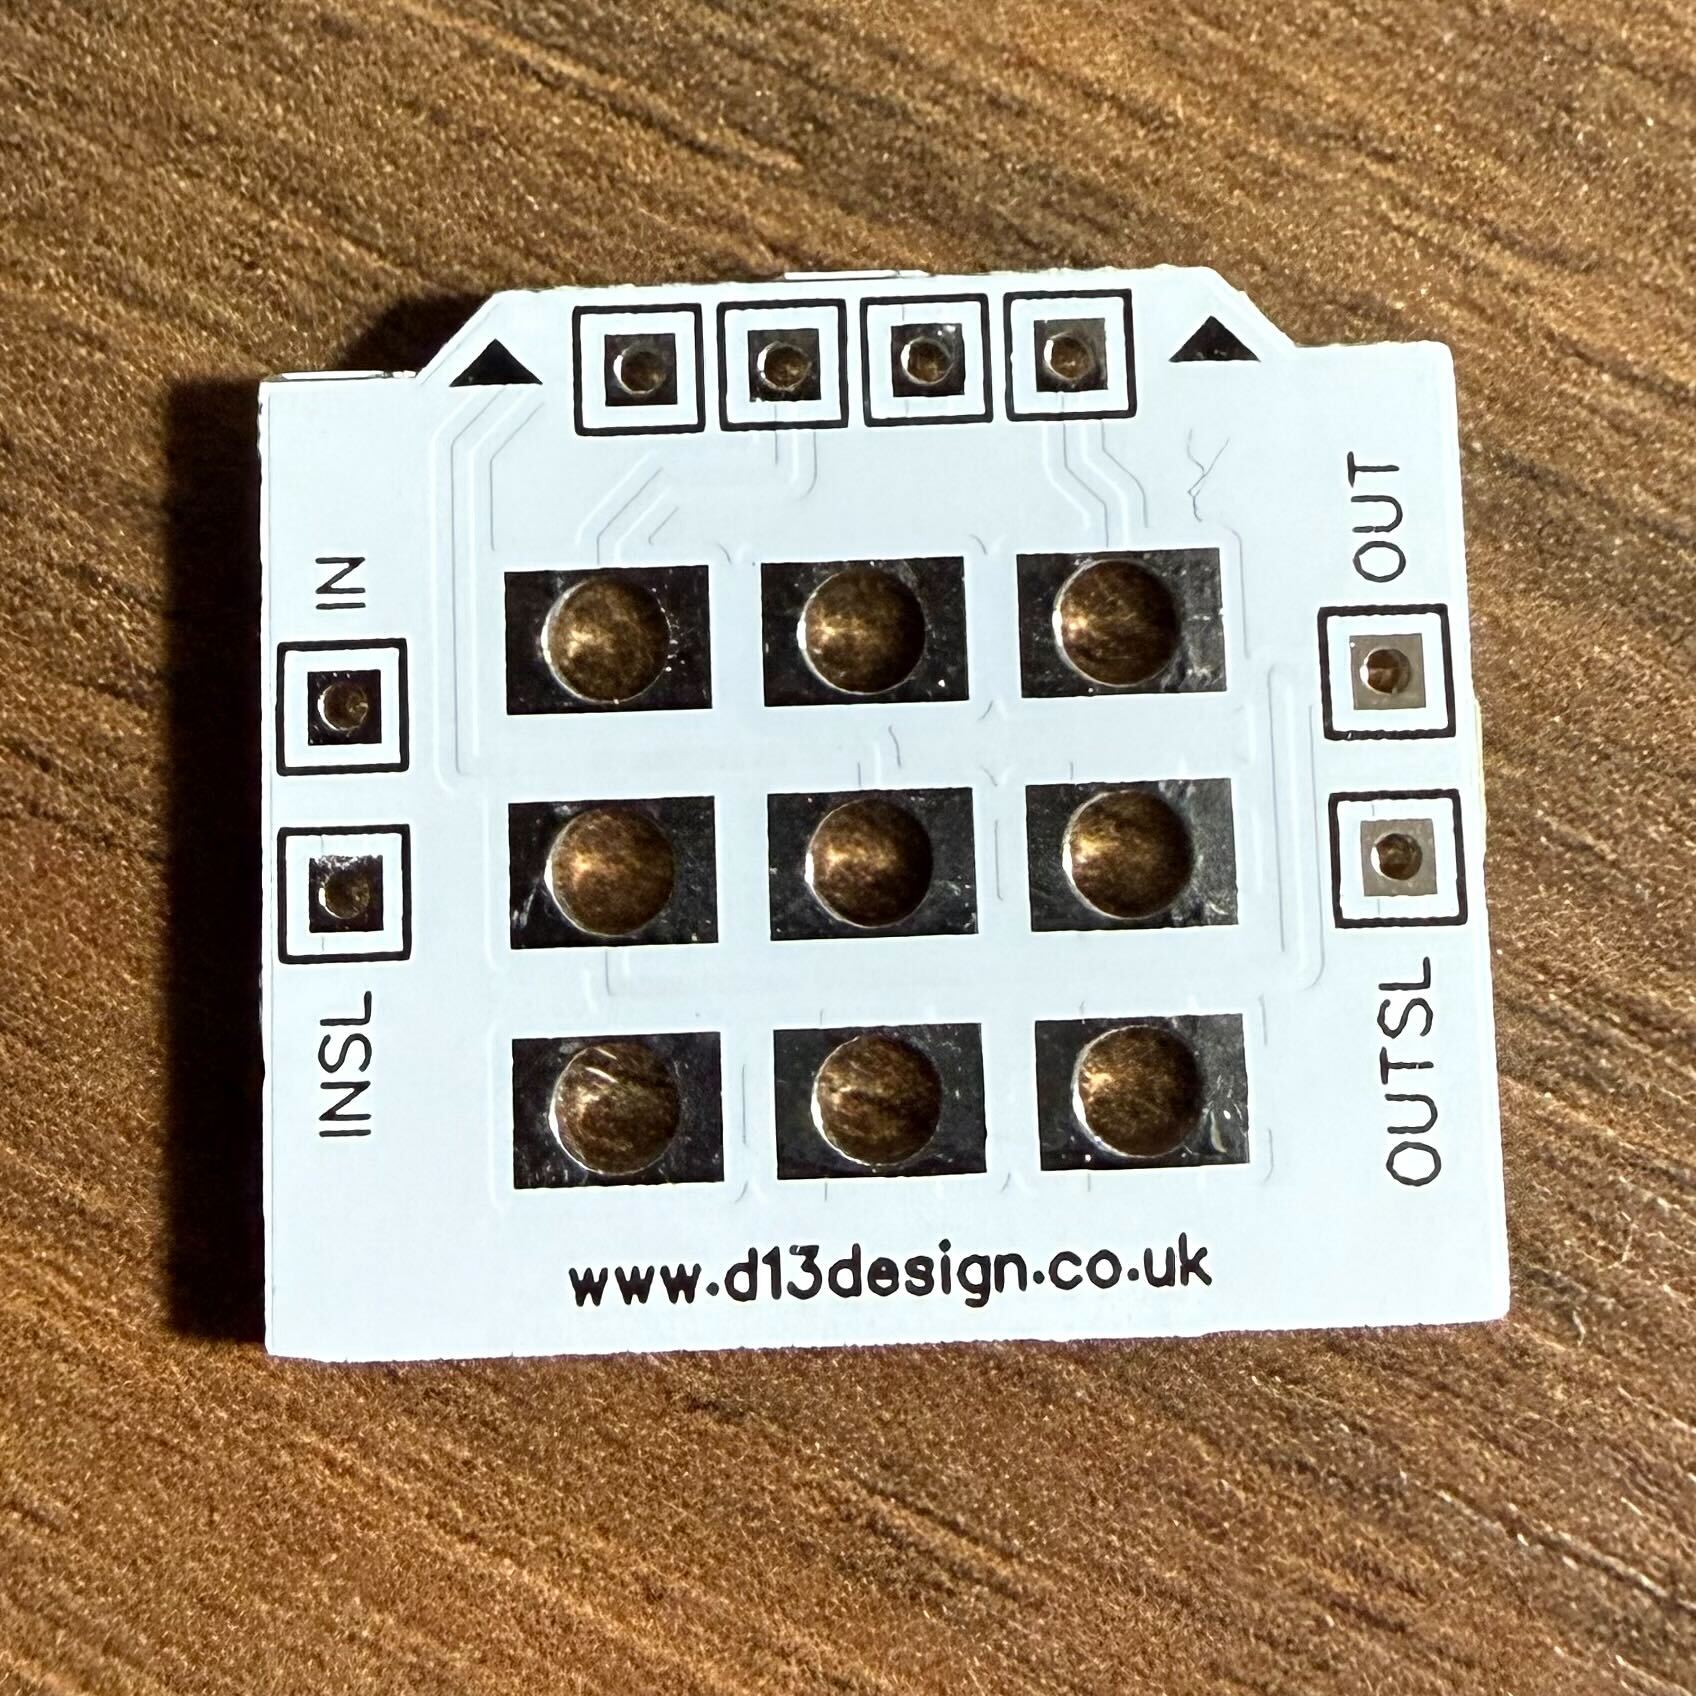
Grab one of these and you’ll also get a 3PDT daughterboard to make wiring in the enclosure even easier.
Component list
| Part # | Value | Component |
|---|---|---|
| U1 | NE5532 / RC4558P / MC33178P | Op-Amp |
| Q1 | MPSA14 | Transistor |
| R1 R2 R10 | 33K | 3x Resistors |
| R3 R11 R12 R14 | 10K | 4x Resistors |
| R4 | 1.8M (1M8) | Resistor |
| R5 R9 | 100K | Resistor |
| R6 | 2.2M (2M2) | Resistor |
| R7 | 22K | Resistor |
| R8 R15 CLR | 4.7K (4K7) | Resistor |
| R13 | 470r | Resistor |
| C1 | 100u | Electrolytic capacitor |
| C2 | 1u | Electrolytic capacitor |
| C4 | 4.7u | Electrolytic capacitor |
| C11 | 3.3u | Electrolytic capacitor |
| C3 C5 C8 C9 | 47n | 4x Ceramic / poly capacitors |
| C6 | 18n | Ceramic / poly capacitor |
| C7 | 120p | Ceramic / poly capacitor |
| C10 | 10n | Ceramic / poly capacitor |
| C12 | 100n | Ceramic / poly capacitor |
| D1 | 1N4002 | Diode |
| D2 D3 D4 | 1N914 | 3 Clipping diodes |
| VOICE | SPDT on-on | Mini toggle switch |
| GAIN | B1M | 9mm potentiometer |
| TONE | B20K | 9mm potentiometer |
| VOLUME | B10K | 9mm potentiometer |
Installing the pots and switch
The 3 potentiometers, and the voice switch, all mount on the back of the PCB ready to be fed through the holes in your enclosure. Just remember to order right-angle pots with either metal or plastic shafts but they need to have fixing nuts.
Wiring the daughterboard
The 3PDT daughterboard connects to your footswitch and provides handy connectors for input, input ground, output, output ground, your main ground connection and the 4 wires leading to your board.
Just remember:
- Orient your 3PDT pins horizontally
- Attach the PCB with the small triangles facing up when viewing the inside of your enclosure – this should match the similar triangles on the main PCB
- Connect each pad to the corresponding pad on your board.